The Complete Guide to Crawl Space Waterproofing: Essential Tips for Keeping Your Home Dry and Protected
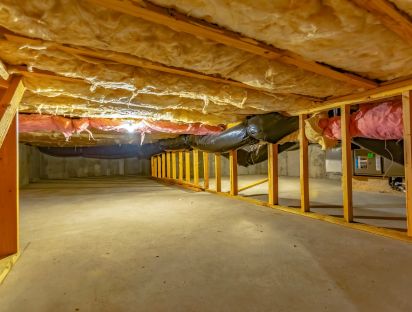
The crawl space, typically featuring exposed soil and limited airflow, is particularly susceptible to moisture accumulation. This moisture can come from various sources, including ground moisture, external weather conditions, and internal home activities such as cooking and bathing that increase humidity levels. Without proper waterproofing measures, this moisture can lead to several serious issues that compromise the safety and comfort of your home.
Preventing these issues starts with a thorough and effective crawl space waterproofing strategy. By addressing moisture problems at their source, homeowners can protect their property from significant damage, improve the home's air quality, and even increase energy efficiency by eliminating the need for excessive heating and cooling, which is often required to counteract the effects of high humidity levels.
Understanding Crawl Space Moisture
Sources of Moisture
Moisture in crawl spaces can originate from several sources, each contributing to the overall humidity and dampness of the area:
- Ground Moisture: The earth surrounding your home naturally contains moisture, which can seep into your crawl space if not properly shielded. This is particularly prevalent in areas with high water tables or inadequate drainage systems.
- Leaks: Water from plumbing leaks or improperly directed downspouts can accumulate in crawl spaces. Additionally, leaks in your home’s foundation or walls can allow water to enter and pool in the crawl space.
- Condensation: Condensation occurs when warm, moist air comes into contact with cooler surfaces, such as foundation walls or exposed pipes in the crawl space. This is common in climates with high humidity or in homes without adequate ventilation or insulation in these lower areas.
Signs of Moisture Problems
Recognizing the signs of moisture problems in your crawl space can help you address issues before they escalate into more serious complications:
- Musty Odors: A telltale sign of moisture problems is a persistent musty smell emanating from the crawl space. This odor can also permeate living spaces, indicating that moisture issues are affecting air quality throughout the home.
- Visible Mold: Mold growth on the walls, floors, or ceiling of the crawl space is a clear indicator of excessive moisture. Mold may appear in various colors, including black, white, green, or yellow, and should be addressed immediately to prevent health risks and further spread.
- Pooling Water: Any visible water accumulation or staining indicates that water is entering the crawl space and not properly draining. This can lead to increased humidity levels and contribute to the deterioration of building materials.
- Structural Wood Damage: Soft, crumbling, or discolored wood in the crawl space may suggest wood rot, which occurs when moisture-laden wood becomes a breeding ground for fungi that destroy the wood's integrity.
Benefits of Crawl Space Waterproofing
Prevent Structural Damage
Moisture is one of the foremost enemies of home durability, particularly in the crawl space where it can go unnoticed for long periods.
- Wood Rot and Corrosion: Excessive moisture can lead to wood rot, which compromises the strength and stability of the wooden structures that support your home. Metal components may also corrode, further weakening structural integrity.
- Foundation Issues: Moisture can cause swelling in expansive soils, which may put pressure on foundation walls, leading to cracks and structural failure over time. Waterproofing helps maintain consistent soil conditions, reducing stress on the foundation.
- Preventative Measures: Effective crawl space waterproofing involves sealing cracks, installing proper drainage systems, and using vapor barriers to keep moisture out. These actions help maintain the structural components of your home in a dry and stable condition, averting potential costly repairs and extending the lifespan of your home’s foundation and framing.
Improve Air Quality
The condition of your crawl space can significantly impact the air quality throughout your entire home, often more than you might realize.
- Mold and Mildew Prevention: By controlling moisture in the crawl space, you significantly reduce the risk of mold and mildew growth, which can adversely affect the home’s air quality. Mold spores from the crawl space can circulate through the entire house, potentially causing health issues like allergies and respiratory problems.
- Reducing Pests: A dry crawl space is less attractive to pests that thrive in damp environments, such as termites and carpenter ants, which can damage your home and lead to poor air quality.
Increase Energy Efficiency
A well-insulated and moisture-controlled crawl space is key to enhancing your home’s overall energy efficiency.
- Thermal Barrier: Proper insulation in the crawl space acts as a thermal barrier, keeping cold air out during the winter and cool air in during the summer. This stabilization of under-home temperatures reduces the workload on your heating and cooling systems.
- Humidity Control: Managing moisture levels with a dehumidifier or proper ventilation prevents excessive humidity, which can make air conditioning systems work harder to cool the home, thereby increasing energy consumption.
- Energy Cost Savings: By improving the thermal environment and controlling humidity, crawl space waterproofing can lead to noticeable reductions in energy bills. Maintaining an energy-efficient home not only saves money but also reduces your carbon footprint.
Waterproofing Techniques
Sealing Vents and Gaps
Sealing off external vents and gaps is crucial to prevent outside moisture and air from entering the crawl space.
- Identify Vents and Gaps: Start by inspecting the crawl space for any existing vents, cracks, or gaps around the foundation and near ground level.
- Materials Needed: Gather materials such as vent covers, caulk, or expanding foam sealant suitable for exterior use.
- Seal Vents: Install vent covers to block off external crawl space vents. Ensure they fit securely and are weather-resistant.
- Seal Cracks and Gaps: Use caulk or expanding foam to seal any visible cracks or gaps around the foundation. Pay special attention to areas where utility lines enter the crawl space.
- Check Seals Regularly: Periodically inspect these seals to ensure they remain intact and reapply materials as necessary due to weathering or pest activity.
Installing Vapor Barriers
A vapor barrier is essential to prevent ground moisture from evaporating into the crawl space air.
- Choose the Right Material: Select a high-quality, durable vapor barrier material, typically a polyethylene plastic sheeting, with a recommended thickness of at least 6 mils.
- Prepare the Area: Clear the crawl space floor of any debris, rocks, or sharp objects that might puncture the barrier.
- Installation: Roll out the vapor barrier across the entire crawl space floor, extending it up the foundation walls about 6 to 12 inches. Overlap sections by 12 inches and seal the seams with waterproof tape.
- Secure to Walls: Attach the barrier to the walls using construction adhesive or mechanical fasteners designed for masonry to ensure it stays in place and provides continuous protection.
Sump Pump Installation
Installing a sump pump can be an effective solution in areas prone to flooding or where ground water levels are high.
- Assess the Need: Consider a sump pump if your crawl space frequently accumulates water or is located in a low-lying area.
- Choose a Location: The sump pump should be installed in the lowest part of the crawl space, where water naturally pools.
- Installation: Cut a hole in the crawl space floor, dig a pit deep enough to accommodate the sump basin, place the basin, and then install the pump according to the manufacturer's instructions.
- Discharge Line: Ensure the water discharges away from the foundation of your home to prevent re-entry of water.
Dehumidification Solutions
Controlling humidity is vital to maintaining a dry crawl space.
- Select a Dehumidifier: Choose a dehumidifier designed specifically for crawl spaces, capable of handling the square footage and conditions.
- Placement: Install the dehumidifier in a central location where air can circulate freely around the unit.
- Maintenance: Regularly check and clean the dehumidifier, ensuring it functions efficiently and the drainage system is not obstructed.
Maintenance and Monitoring
Routine Inspections
Regular inspections of your crawl space are crucial for early detection of potential moisture issues before they escalate into more serious problems.
- Frequency of Inspections: It is recommended to inspect your crawl space at least twice a year, ideally in spring and fall. Additional checks should be done after heavy rains or flooding.
- What to Look For: During each inspection, look for signs of moisture such as water pooling, damp insulation, mold growth, or musty odors. Check the condition of vapor barriers and seals around vents and pipes for any damage or dislodgment. Inspect structural elements like wooden beams for any signs of rot or pest infestations.
Maintenance Tips
Maintaining a dry crawl space requires regular upkeep of installed systems and preventive measures.
- Sump Pump Maintenance: Test your sump pump regularly by pouring water into the pit to ensure it activates automatically and drains the water quickly. Check for clogs or debris in the intake and discharge lines. Replace batteries in backup systems annually.
- Dehumidifier Care: Regularly clean or replace the filters in your dehumidifier, according to the manufacturer’s instructions. Ensure that it is functioning efficiently and that the collection reservoir or drain line is not obstructed.
- General Upkeep: Remove any organic materials like leaves or wood from the crawl space which can attract moisture or pests. Ensure that all drainage systems around your home are functioning properly to divert water away from the foundation.
Using Hygrometers
A hygrometer can be an invaluable tool for monitoring the effectiveness of your crawl space’s humidity control measures.
- Selecting a Hygrometer: Choose a digital hygrometer for ease of use and accuracy. Some models come with remote monitoring capabilities, allowing you to check humidity levels without entering the crawl space.
- Placement: Install the hygrometer in a central location in the crawl space where it won’t be directly affected by the dehumidifier’s air flow.
- Monitoring: Regularly check the humidity level to ensure it stays below 50%, which is generally recommended to prevent mold growth and reduce condensation. Adjust your dehumidification strategies based on the readings to maintain optimal conditions.
By following these maintenance and monitoring guidelines, you can ensure that your crawl space remains dry and healthy, thereby protecting your home’s structural integrity and indoor air quality. Regular checks and upkeep not only extend the life of waterproofing measures but also help avoid costly repairs down the line.